Overview
MeshExpert Live! includes a complete set of hardware, support software, and application software. This guide will first provide you the detailed description of hardware specifications and their assembly methods; then it will introduce you how to use the system, including license installation and management, management of HoloLens device and app installation and management; lastly, it will show some built-in demo apps.
System Structure
MeshExpert Live! is made up of two parts:
- Live Rig: a set of movable video device with the function of getting video and location information of the real world.
- Live WorkStation: a high performance graphics workstation used for running holographic program and synthesizing real-time holographic video.

System Structure
How It Works

MeshExpert Live! contains two main parts, collaboration, and live streaming. The collaboration within multiple devices which is achieved by delivering messages between these devices through HoloServer makes real-time synchronization of scenes on these devices a reality. Through camera shooting and capturing real scenes, while getting the mapping of spatial position by HoloLens on the tripod, live streaming is achieved by putting them into Live Controller in Workstation to carry out real-time 3D synthesis and then output onto screens through HDMI interface.
RIG Installation
The Rig is used for obtaining the real-world images and location information and further delivering them to the workstation in order to carry out real-time synthesis.
MeshExpert Live! Rig consists of the following main components:
- Digital camera/video camera
- HoloLens
- Tripod
- Accessories for fixing
Note: HoloLens here is responsible for providing location information. You can replace it with other devices which also can provide position information. Besides, HoloLens can be removed if you don't need real-time synchronization of location information, such as fixing the camera stand.
Rig Assembly
The purpose of the assembly is to securely secure the complete set of equipment together to minimize the effects of unstable factors such as shaking. Depending on the requirements of the working site and the choice of equipment, the ways of assembly and connection may vary. If you want to use non-recommended equipment, please make sure that you know how to connect them together. Below is a typical example of the assembly.
| item | Function | specification |
|---|---|---|
| HoloLens stand | Fix HoloLens firmly | Aluminium stand offered by DataMesh |
| Digital camera | Hot shoe interface for the the convenience of connecting HoloLens | Sony ICLE-6500 + EPZ 16-50 |
| Tripod/head | Support camera and HoloLens firmly | |
| Other accessories | Camera can connect to HoloLens through hot shoe interface | Screws for hot shoe switch |
The assembly processes of Rig Suite depicted in the picture below, and the steps are as follows:
- Fix HoloLens on the dedicated Aluminum HoloLens Bracket.
- Add the Hotshoe Adapter to the HoloLens mount in Step 1 (to later in Step 5, connect the HoloLens mount to the camera).
- Connect the Camera to the Tripod.
- Fix the Hotshoe Fastener to the Camera.
- Finally, connect the HoloLens Mount and the Camera by connecting the Hotshoe Adapter and the Hotshoe Fastener.

RIG Assembly Diagram
Workstation Installation
Hardware Requirements
The workstation requires a certain amount of computing power, which could be satisfied by hardware sets of the given specifications, to meet the demands of MeshExpert Live!. There would also be some restrictions regarding the hardware and software choices. Below is a list of recommended requirements for the workstation:
| Item | Specification | Remark |
|---|---|---|
| CPU | Intel Skylake 6700K or above OR AMD Ryzen 1700X or above | |
| GPU | NVIDIA GeForce GTX 1070 or above |
|
| Mainboard | Support M.2 SSD or PCI-E SSD | |
| Memory | 16GB dual-channel DDR4 or above | |
| Hard disk | 500GB M.2 SSD or PCIE SSD |
|
| Operating system | Windows 10 64bit or above |
|
Note 1: Visit https://developer.nvidia.com/video-encode-decode-gpu-support-matrix#Encoder to see the NVIDIA GPU support matrix.
Note 2: Single common GTX1070 card could accelerate the transcoding process up to 8x, which roughly means the system can process an 8-minutes recording in about 1 minute. The use of cards of lower GPU computation power is also possible but would result in slower video processing.
Assembly Steps
Workstation access steps are as follows:

Workstation Connection Diagram
- Connect the camera's HDMI Output Port to the Input Port of the capture card of the workstation, with a HDMI to Mini-HDMI cable.
- Connect the Micro USB port of HoloLens to one of the USB3.0 port on the workstation with a Micro USB to USB cable. (This is for the convenience of USB debugging and charging of HoloLens, and thus is optional) .
- Connect the workstation to the LAN Port of the Wireless Router using a Lan cable.
- Use an HDMI to HDMI cable to attach the Output Port of the capture card of the workstation to an external display or any other campatible screens.
- Let the HoloLens join the local wireless network and make sure the HoloLens and the workstation are in the same vlan.
Configurations
Network Configurations
- Get the Rig and Workstation ready first.
- Make sure a dedicated WIFI router, 802.11ac perferred, with wired connection has connected to the Rig. Router IP should be
192.168.8.1, DHCP range set to192.168.8.100~249. Internet link is not necessary. - IP address of the Workstation should be set to
192.168.8.250. We need to run both of the soft Suite and the Demo app on it.
Note: If you have other devices to collaborate, e.g. a Surface Pro as a controller, it needs to join the same WIFI network with wireless connnection, which would get an IP from pool
192.168.8.100~249automatically. Besides, please make sure there's not a lot of WIFI devices around when you start to move the rig. WiFi latency impacts the performance.
Environment Preparation
- Connect everything to the WIFI router. Make sure they all have
192.168.8.xIP address, and the workstation has the fixed IP192.168.8.250. This is very important since we fixed the network settings to ensure there's no surprise. - Install the
SpectatorView Test Apponto your spectator view HoloLens on the Rig. You can download theSpectatorView Test Appfrom here.
Usage Guide for MeshExpert Center
Installation
Find the MeshExpert Installer.exe, double click it, and proceed according to the installation guide. If you have installed an older version, please uninstall the old version first.
Start Menu Icon
Dashboard Panel

Dashboard Panel
Dashboard panel provides the following main functionalities: 1. Manage the MeshExpert Server, such as start, shutdown and restart 2. Check and display the status, the version and the connectivity of the MeshExpert Server 3. Alert error message when error occurs
Note 1: You should make sure that the MeshExpert Server is started if you want to do anything further
Note 2: You can manually check the MeshExpert Server's status by clicking the
RecheckiconNote 3: You may need to restart or reinstall the MeshExpert Server when an error occurrs. Please follow the troubleshooting instructions or contact us if you any further question.
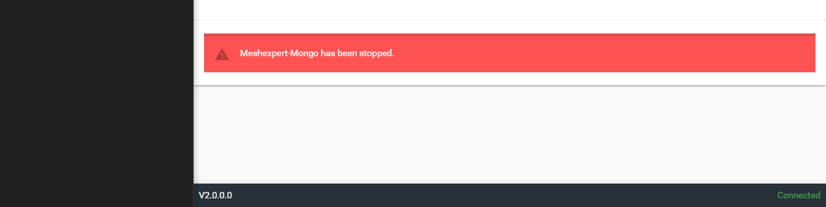
Dashborad Error Alert
Devices Panel

Devices Panel
Devices Panel provides the following main functionalities: 1. Add HoloLens 2. upload HoloLens applications to HoloLens 3. Install HoloLens applications on HoloLens 4. Manage the applications installed through this Device Panel, such as start, stop, restart and removal 5. Show basic infos of the applications which are installed through this Device Panel and also running currently
You can add HoloLens in the Add HoloLens section. Before you start the adding operation, you should make sure that the HoloLens the MeshExpert Server are in the same network segment (usually connected to same router) and can communicate with each other.
My Apps Panel
In My Apps Panel, you can upload your applications to HoloLens and view basic infos of the applications which are already uploaded.

My Apps Panel
Account Panel
In Account Panel, you can view and manage your account and license infos.

Account Panel
DataMesh Live Agent
DataMesh Live Agent is an App of HoloLens, which can synchronize real world information to the workstation. Follow that, the Live program running on the workstation can retrieve the position, rotation of all anchors and camera, so that Live program can record the Hologram and real world images continually.
Live Agent can support any Live program built by METoolkit. You don't need to restart Live Agent even when you switch to another Live program.
Installation
The DataMesh LiveAgent is just a HoloLens app. We suggest you install it by MeshExpert Center, like other HoloLens apps, so that center can set the configurations automatic. If you install this app manually, you need to configure the workstation IP yourself using HoloLens portal.
To download the latest DataMesh LiveAgent, visit our Download Center.
How to use
Please refer to METoolkit Live module.