Integrated Entrypoint
Through an integrated entrypoint provided by METoolkit, users are able to import and integrate all the METoolkit modules to apps at once just by dragging them to the scene.
Preparing for Use
- Import METoolkit to Unity Project.
- Go to folder "DataMesh/ARModule/Entrance/" and drag MEHoloEntrance bundle into Unity scenes.
- Choose MEHoloEntrance in the scene and click "Create All MEHolo Module" button on Inspector Panel.

- MEHolo objects will be automatically generated in the scene, which includes all the modules in Toolkit.

Choose Modules
- After MEHolo being created, click MEHoloEntrance object again to see the Inspector Panel, and you will see the contents have been updated.

- Here you can choose what modules to use, and uncheck those you don't need.
- NOTE: there are module dependencies such that the use of some modules demands some other modules to be present. For instance, when Live module is checked, Anchor and Input modules will be checked automatically and can not be unchecked.
- As for the detailed usage of these modules, please refer to their corresponding instructions later in this section.
Code Integration
MEHoloEntrance will automatically run and initialize after the app started. But before initialization, the system is not ready for use. Therefore, developers should check the 'HasInit' property in code and wait until its value turned to 'true' before any other operations.
Demo codes are as follows:
using System.Collections;
using UnityEngine;
using DataMesh.AR;
public class MainApp : MonoBehaviour
{
    // Use this method to initialize
    void Start()
    {
        StartCoroutine(WaitForInit());
    }

    private IEnumerator WaitForInit()
    {
        MEHoloEntrance entrance = MEHoloEntrance.Instance;
        while (!entrance.HasInit)
        {
            yield return null;
        }
        // Todo: Begin your logic
    }
}
WorldAnchor Controller Module
Functionalities
SceneAnchorController provides the following functions:
- Manage the spatial scenes scanned by HoloLens.
- Manage the spatial anchor, WorldAnchor, including creation, modification, deletion, storage, etc.
- Include a set of user interfaces to operate spatial anchors where users can adjust the position and angle of each Anchor by gesture.
- Anchor upload and download (through the workstation).
Note that HoloLens can use the raw WorldAnchors and other devices need to simulate the anchor.
Next, let us create our first demo app following the procedures below.
Prepare Your Project
- Create a Unity project and set it up accordingly for HoloLens apps (refer to doc "Holograms 101E" by Microsoft).
- Create three objects: Cube, Sphere, Cylinder, and place them in a position where the camera can capture.
- Set up METoolkit modules (refer to the ME-HoloEntrance instructions in the previous section).
- Confirm to check Anchor, Input and Cursor Modules in HoloEntrance.

Prameters
In the Hierachy View, find MEHolo/AnchorManager object and choose it, and you will see the following panel in the Inspector View. Leave the parameters as defaults, later in this section you will get to know their meanings and then adjust them accordingly.

Setting up Anchor
- Choose an Anchor Object (such as Cube) you want to add, and then add "AnchorDefinition" in the Inspector Panel.

- Enter a name for the Anchor.

-
Choose the object in the scene and you will see a blue bounds which indicates the Anchor scope. By dragging the ball handles, you can change the size of the bounds.

Note: the size of the bounds is only used for showing the Anchor when it is moved. It has no practical significance and can be set according to your preferences.
-
Now the Anchor of one object is set, please set the Anchors of the other two objects yourself with the same procedures.
Write a Test Demo
- Create an object of name "App" in Hierarchy view.
- Add a new module with name "SceneAnchorSample" and save.
- Open the "SceneAnchorSample" module to add the following codes:
using System.Collections;
using UnityEngine;
using DataMesh.AR;
using DataMesh.AR.Anchor;
using DataMesh.AR.Interactive;

public class SceneAnchorSample : MonoBehaviour
{
    private MultiInputManager inputManager;

    void Start ()
    {
        StartCoroutine(WaitForInit());
    }

    private IEnumerator WaitForInit()
    {
        MEHoloEntrance entrance = MEHoloEntrance.Instance;
        while (!entrance.HasInit)
        {
            yield return null;
        }

        // Todo: Begin your logic
        inputManager = MultiInputManager.Instance;
        inputManager.cbTap += OnTap;
    }

    private void OnTap(int count)
    {
        inputManager.cbTap -= OnTap;

        SceneAnchorController.Instance.cbAnchorControlFinish = ModifyAnchorFinish;
        SceneAnchorController.Instance.TurnOn();
    }

    private void ModifyAnchorFinish()
    {
        SceneAnchorController.Instance.TurnOff();
        inputManager.cbTap += OnTap;
    }
}
Now you can build and install the app to HoloLens to see the results.
Change Anchor
- After starting the app in HoloLens, you shall see three objects in front of you.
- Air-tap at any place to enter the Anchor adjustment mode. Now every anchor you created would show up with bounds and with a blue crystalline at the base position indicating the position of the Anchor.

- Gaze at the bounds box of an object, and then air-tap it. The box would change color and glitter indicating a selection of the object. Upon selection, three square buttons would show up above the crystalline.

- Fix your eyes with the cursor on the middle "Gaze" button and air-tap. You will enter the "Eye Move Mode" where the spatial grid would appear. In this mode, the object would move alone with the focal point (the cursor) and when stops it would land on the spatial grid.
Note: if there is no spatial grid covering the focal point, the object would float at 3 meters away from the currently gazed position. To exit the "Eye Move Mode", do another air-tap.
- When the choose buttons appear, gaze at the left "Move" button and air-tap, then you will enter the "Manual Move Mode" and three moving axes would show up under the crystalline.
- when using HoloLens, you can "Tap your finger down and Move" to move the object in the space.
- when used on a computer, a keyboard hint would show up alone with the axes (as demonstrated in the following picture). Following the hint, you can move the object around using the "UIOJKL" keys on your keyboard.

- When gaze at the right "Rotate" Button and air-tap, you will enter the "Manual Rotate Mode" where the a rotating sign would surround the the crystalline.
- when using HoloLens, you can "Tap your finger down and Move" to rotate the object in the space.
- when used on a computer, you can follow the hint to use the "UIOJKL" keys to help you rotate the object.

Note: when an object is selected, you can air-tap at a blank area to unselect the object. when no object is selected, you can air-tap at a blank area to exit the Anchor Editing Mode, where the surrounding boxes and crystalline would all disappear, and the positions of objects will be saved so that on next boot all the positions would be automatically restored if the space matches.
Upload Anchor
- Please make sure the MeshExpert Suite services are started on the Workstation (About how, refer to User Guide for workstation).
- In the Hierarchy View, find and select the MEHolo/AnchorManager object.
- Check Inspector View and set the parameters:

- App Id: the unique ID of the app in 4-bytes integer.
- Room Id: the unique ID of the room in string. A room in ME-Live! is where players get together and collaborate with each other. Scenes in a room are synchronized via the Workstation.
- Server Host: the workstation's IP address.
- Server Port: the port number of the service on the workstation, defaults to 8823.
- Open class SceneAnchorSample to add the OnTapUpload() method:
private void OnTapUpload(int count)
{
    CursorController.Instance.isBusy = true;
    SceneAnchorController.Instance.UploadAnchor((bool success, string error) =>
    {
        CursorController.Instance.isBusy = false;
        if (success)
        {
            CursorController.Instance.ShowInfo("Upload Anchor Success!");
        }
        else
        {
            CursorController.Instance.ShowInfo("Upload Error! reason is: " + error);
        }
    });
}
- In the WaitForInit() method, modify the processor method of air-tap to OnTapUpload():
private IEnumerator WaitForInit()
{
    MEHoloEntrance entrance = MEHoloEntrance.Instance;
    while (!entrance.HasInit)
    {
        yield return null;
    }

    // Todo: Begin your logic
    inputManager = MultiInputManager.Instance;
    inputManager.cbTap += OnTapUpload;
}
- Build and then install the app on HoloLens to check the results.
- After the app started, follow the steps below to upload an Anchor:
- First check if the positions of objects are desirable.
- air-tap at any place.
- Now the uploading process should have begun, and the focal icon would turn into "Loading" status.
- Upon success, the focal icon would restore to normal and a success hint will appear.
Download Anchor
- To download an anchor from the workstation, you need to make sure you have already uploaded an anchor following the instructions in previous section.
- Open "SceneAnchorSample" class to add the "OnTapDownload()" method below:
private void OnTapDownload(int count)
{
    CursorController.Instance.isBusy = true;
    SceneAnchorController.Instance.DownloadAnchor((bool success, string error) =>
    {
        CursorController.Instance.isBusy = false;
        if (success)
        {
            CursorController.Instance.ShowInfo("Download Anchor Success!");
        }
        else
        {
            CursorController.Instance.ShowInfo("Download Error! reason is: " + error);
        }
    });
}
- In the WaitForInit() method, modify the processor method of air-tap to OnTapDownload():
private IEnumerator WaitForInit()
{
    MEHoloEntrance entrance = MEHoloEntrance.Instance;
    while (!entrance.HasInit)
    {
        yield return null;
    }

    // Todo: Begin your logic
    inputManager = MultiInputManager.Instance;
    inputManager.cbTap += OnTapDownload;
}
- Build and then install the app to HoloLens.
- After the app started, follow the steps below to download an Anchor:
- Air-tap at any place.
- The downloading process would automatically start, and the focal icon will turn into "Loading" status.
- After finished, the focal icon would restore to normal status and a success hint would show up.
- If the anchor is successfully downloaded, and the scenes scanned by HoloLens match the downloaded data, the Anchor objects would appear at where the previously uploaded Anchors positioned.
Note: in order to actually see the objects re-positioning by the downloaded Anchors, you may need to upload a moved Anchor and then download it. If so, you need to move the Anchor and upload it following the instructions in the previous two sections.
Multi-Input Manager Module
Functionalities
MultiInputManager provides the following functions:
- Manage input events on multiple platforms
- Provide a unified callback interface for basic input events on multiple platforms, for instance, gestures on HoloLens and keyboard and mouse operations on PC.
- Set callback methods for Navigation gesture and Manipulation gesture respectively on HoloLens and switch they if necessary.
Please refer to the following procedure to create a demo app
Prepare Your Project
- Create a Unity project and set it up accordingly for HoloLens apps (refer to doc "Holograms 101E" by Microsoft).
- Set up METoolkit modules (refer to the ME-HoloEntrance instructions).
- Confirm to check Input module in HoloEntrance.
- Create a Cube object and place it in a position where the camera can capture.
Bind the Callback
Now we test the the binding of callback function, using Click and Navigation as an example.
- Create an object in Hierarchy view named "App"
- Add a new module named "InputSample" to the "App" object, and save.
- Open the "InputSample" module to add the following codes:
using System.Collections;
using UnityEngine;
using DataMesh.AR;
using DataMesh.AR.Anchor;
using DataMesh.AR.Interactive;
public class InputSample : MonoBehaviour
{
    public Transform targetObject;
    private MultiInputManager inputManager;
    void Start()
    {
        inputManager = MultiInputManager.Instance;
        StartCoroutine(WaitForInit());
    }
    private IEnumerator WaitForInit()
    {
        MEHoloEntrance entrance = MEHoloEntrance.Instance;
        while (!entrance.HasInit)
        {
            yield return null;
        }
        // Todo: Begin your logic
        BindinputManager(true);
    }
    private void OnNavigationEnd(Vector3 delta)
    {
        Debug.Log("Navigation End");
    }
    private void OnNavigationStart(Vector3 delta)
    {
        Debug.Log("Navigation Start");
    }
    private void OnNavigationUpdate(Vector3 delta)
    {
        Debug.Log("Navigation Update");
        targetObject.Rotate(new Vector3(0, 1, 0), -delta.x);
    }
    void OnTapped(int tapCount)
    {
        Debug.Log("Tapped Event");
        targetObject.GetComponent<MeshRenderer>().material.color = new Color(1, 0, 0);
    }
    public void BindinputManager(bool bind)
    {
        inputManager.ChangeToNavigationRecognizer();
        if (!bind)
        {
            Debug.Log("unbind gesture");
            inputManager.cbTap -= OnTapped;
            inputManager.cbNavigationStart -= OnNavigationStart;
            inputManager.cbNavigationUpdate -= OnNavigationUpdate;
            inputManager.cbNavigationEnd -= OnNavigationEnd;
            return;
        }
        else
        {
            Debug.Log("bind gesture");
            inputManager.cbTap += OnTapped;
            inputManager.cbNavigationStart += OnNavigationStart;
            inputManager.cbNavigationUpdate += OnNavigationUpdate;
            inputManager.cbNavigationEnd += OnNavigationEnd;
        }
    }
}
- Drag the "Cube" in the scene to the "targetObject Column" of "InputSample" of "App" in the Hierarchy View.

- Release the Project to HoloLens or start it directly in Unity.
Note: If you run the app in Unity on PC, the Alt+J/K/L/I/U/O keys on PC would be mapped to the Navigation gesture on HoloLens. And if you have bound the Manipulation gesture, the corresponding keys on PC would be Shift+J/K/L/I/U/O.
Switch between Navigation and Manipulation
The use of Manipulation is the same as that of Navigation. The difference is that the input parameters of Manipulation are the absolute displacement of user's hand in the real world.
Add the following codes in the "InputSample" script to options to switch to the Manipulation gesture.
public void BindinputManager(bool bind, bool isManipulation)
{
    if (!bind)
    {
        Debug.Log("unbind gesture");
        inputManager.cbTap -= OnTapped;
        inputManager.cbNavigationStart -= OnNavigationStart;
        inputManager.cbNavigationUpdate -= OnNavigationUpdate;
        inputManager.cbNavigationEnd -= OnNavigationEnd;
        inputManager.cbManipulationEnd -= OnManipulationEnd;
        inputManager.cbManipulationStart -= OnManipulationStart;
        inputManager.cbManipulationUpdate -= OnManipulationUpdate;
        return;
    }
    else
    {
        Debug.Log("bind gesture");
        inputManager.cbTap += OnTapped;
        if (!isManipulation)
        {
            inputManager.ChangeToNavigationRecognizer();
            inputManager.cbNavigationStart += OnNavigationStart;
            inputManager.cbNavigationUpdate += OnNavigationUpdate;
            inputManager.cbNavigationEnd += OnNavigationEnd;
        }
        else
        {
            inputManager.ChangeToManipulationRecognizer();
            inputManager.cbManipulationEnd += OnManipulationEnd;
            inputManager.cbManipulationStart += OnManipulationStart;
            inputManager.cbManipulationUpdate += OnManipulationUpdate;
        }
    }
}
private void OnManipulationEnd(Vector3 delta)
{
    Debug.Log("Manipulation End");
}
private void OnManipulationStart(Vector3 delta)
{
    Debug.Log("Manipulation End");
}
private void OnManipulationUpdate(Vector3 delta)
{
    targetObject.Translate(delta);
}
Speech Manager Module
Functionalities
SpeechManager offers voice control of Hololens. Developers could add keywords as control commands alone with corresponding callback methods. If the speech manager is enabled, it will constantly monitor the voice input of HoloLens. And when a voice command is detected, the bound action will take place.
Use of SpeechManager
- Create a Unity project and set it up accordingly for HoloLens apps (refer to doc "Holograms 101E" by Microsoft).
- Set up METoolkit modules (refer to the ME-HoloEntrance instructions).
- Do not check the "Auto Turn On" box, and we need to enable or disable voice control manually.

- Call AddKeywords() method of SpeechManager to add keywords and associated action method for voice commands.
void Start ()
{
    SpeechManager.Instance.Init(); // manually initialize since we do not check the AutoTurnOn box
    SpeechManager.Instance.AddKeywords("Open Menu", OpenMenuAction);
    SpeechManager.Instance.TurnOn(); // now enable voice commands recognition
}

public void OpenMenuAction ()
{
    Debug.Log("Recognize command: Open Menu");
}
Note: The codes above add a voice command "Open Menu", and in its action part, we print a log message. SpeechManager currently supports both English and Chinese. You can add a command in Chinese to try it out yourself.
Cursor Module
Functionalities
Cursor helps users to get accurate gazing positions, much like a mouse cursor. It could also be used to carry some context information.
Use of CursorController
- Create a Unity project and set it up accordingly for HoloLens apps (refer to doc "Holograms 101E" by Microsoft).
- Set up METoolkit modules (refer to the ME-HoloEntrance instructions), and make sure to check Cursor and Input modules in MEHoloEntrance.
- Create a CursorController module, check "AutoTurnOn" in CursorController ( or leave it unchecked and manually enable the Cursor in code):

- Create a new Cube positioned right ahead of the camera. Run it with Unity and you will see a hand-shaped Icon when the camera focused on the cube. This depends on the Collider of the Cube, that is, when the collider is touched the hand-shaped icon appears.

- When the focus moved away from the Cube, the cursor would restore to normal.

More about CursorController
- Developers can manually turn the CursorController on or off by the following codes:
    CursorController.Instance.TurnOn();  // Enable CursorController
    CursorController.Instance.TurnOff(); // Disable CursorController
- You can display some textual information on the Cursor using:
    string str = "ShowStringInfo";
    CursorController.Instance.ShowInfo(str);
- Cursor could be used to report a "busy" status to users. That is, developers can set the status of a cursor to "busy" so that the cursor would turn into a "loading" icon to send a "busy" message to the user.
CursorController.Instance.isBusy = true;
Note: The code above sets the Cursor to a "busy" status. However, this status is merely a visual display and the app is not interrupted at all, which means users could still operate under the busy status. To actually block user operations, you need extra codes to do it.
BlockMenu Module
Functionalities
BlockMenu provides a block-based main menu. Compared with other menu forms, it is more suitable for VR/AR applications as it can be gazed at easily.

BlockMenu has the following main functionalities:
- Show four square buttons centered at the gaze point, which ensure the shortest moving distances at all four directions.
- Any menu button can be further expanded to sub-menus. Once the cursor moves over a button, it will automatically expand if it has sub-menus.
- Sub-menus would automatically fold if the cursor moves away from it, to avoid a flood of buttons.
- The main menu would also be automatically closed after a short period of time. Of course, manual close is also ok.
- Menu buttons can display pictures and texts.
Menu Editor
BlockMenu has an editor to support easy-editing of the menus.
Open menu "Window->DataMesh->BlockMenuMaker" in Unity.

You will see the main interface of the editor:
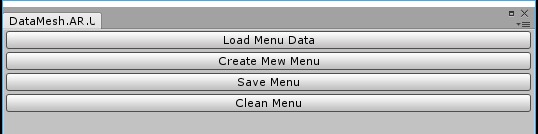
Click "Create New Menu Configuration". Choose a location in the pop-up box to store the menue, and enter the name for the menu (e.g. "MainMenu.json") to save it as a JSON file.
Enter a name for the panel, which will be used as the unique ID of this panel in the app.

Click "Create Root Panel" button, and it will generate the first-level panel with 4 possible buttons.

You can choose to edit the add any of the four buttons.

Note that if you choose to use a rectangular picture as the backgroud for a button, you need to set its format as "Sprite(2D and UI)".

And you should place your backgroud pictures in "Assets/Resources/UI/Texture/" (If this directory not exists, create it manually). When referencing the picture, you only need to fill out its base name without directory and file extension.

If you need sub-menus, you can click "Create Sub Panel" and fill the information of sub-menus just like the main menu.

Note: The sub panel would block one of the buttons according to the position of its parent button, thus the sub panel has only three buttons available for use. If you want to show a menu button without binding any actions to it, you could uncheck the "Clickable" box so that the button would appear to be grey and unclickable when the menu pops up.
Lastly, do not forget to click "Save" button when you finish editing to save your work.
Prepare Your Project
- Create a Unity project and set it up accordingly for HoloLens apps (refer to doc "Holograms 101E" by Microsoft).
- Create three objects: Cube, Sphere, Cylinder, and place them in a position where the camera can capture.
- Set up METoolkit modules (refer to the ME-HoloEntrance instructions).
- Confirm to check BlockMenuManager, Input, and Cursor Modules in HoloEntrance.
Add a Menu
It's easy to add a menu to the scene, as you can drag the previously saved menu data (the JSON file) to the MenuManager.
- Find and choose "MEHolo/BlockMenuManager" in the Hierarchy View.
- Locate the saved menu data from the Project view, and drag it to the "Menu Data List" property in the Inspector view of BlockMenuManager.

- Now you can see that the menu data have been imported.

Use a Menu
- Create an object named "App" in Hierarchy view.
- Add a new module with name "BlockMenuSample" and then save.
- Open the "BlockMenuSample" module to add the following codes:
using System.Collections;
using UnityEngine;
using DataMesh.AR;
using DataMesh.AR.UI;
using DataMesh.AR.Interactive;

public class MenuSample : MonoBehaviour
{
    private MultiInputManager inputManager;
    private BlockMenuManager menuManager;
    private BlockMenu mainMenu;

    // Use this for initialization
    void Start ()
    {
        StartCoroutine(WaitForInit());
    }

    private IEnumerator WaitForInit()
    {
        MEHoloEntrance entrance = MEHoloEntrance.Instance;
        while (!entrance.HasInit)
        {
            yield return null;
        }

        // Todo: Begin your logic
        menuManager = BlockMenuManager.Instance;
        mainMenu = menuManager.GetMenu("MainMenu");
        mainMenu.RegistButtonClick("button1", OnClickButton1);

        inputManager = MultiInputManager.Instance;
        inputManager.cbTap = OnTap;
    }

    private void OnTap(int count)
    {
        menuManager.OpenMenu(mainMenu);
    }

    private void OnClickButton1()
    {
        Debug.Log("Click Button!");
        CursorController.Instance.ShowInfo("Click Button!");
    }
}
- Now you can build and install the app to HoloLens to see the results.
- How to operate the menu? You can air-tap at any place to open the main menu. And if you gaze at the left-upper corner of any menu buttons, it will open its sub-menu if present, and if you air-tap at the same time you the hint text will show up.
Note: You can also use our demo code directly at "Assets/DataMesh/Samples/Menu".
Collaboration Module
Functionalities
CollaborationManager provides the following functions:
- Group players by rooms to let them collaborate with each other.
- Let a wide range of devices to communicate through the Workstation.
- Wrap a generic message format and communication channels to facilitate collaborations.
Prepare Your Project
- Create a Unity project and set it up accordingly for HoloLens apps (refer to doc "Holograms 101E" by Microsoft).
- Create a Scene, and save it as "CollaborationSample".
- Create a Cube object, and place it in a position where the camera can capture.
- Set up METoolkit modules (refer to the ME-HoloEntrance instructions).
- Confirm to check Collaboration Module in HoloEntrance.

Set up Collaboration
In the Hierarchy view, locate the "MEHolo/CollaborationManager" and check it. In the Inspector view, the below panel will show up. You can set its parameters on the panel or in your scripts.

- App Id: the unique ID of the app in 4-bytes integer.
- Room Id: the unique ID of the room in string. A room in ME-Live! is where players get together and collaborate with each other. Scenes in a room are synchronized via the Workstation.
- Server Host: the workstation's IP address.
- Server Port: the port number of the service on the workstation, defaults to 8823.
Try Collaboration
- Create an object named "MainApp" in Hierarchy view.
- Add a new module "CollaborationSample" and then save.
- Open the "CollaborationSample" to add the following codes:
using System.Collections;
using UnityEngine;
using DataMesh.AR.Interactive;
using DataMesh.AR.Network;
using MEHoloClient.Entities;

namespace DataMesh.AR.Samples.Collaboration
{
    public enum ColorType
    {
        red = 0,
        blue = 1,
        green = 2,
    }
    public class CollaborationSample : MonoBehaviour, IMessageHandler
    {
        private MultiInputManager inputManager;
        CollaborationManager cm;

        int appId;
        string roomId;
        string serverHost;
        int serverPort;
        ColorType CurrentColor;
        ShowObject showObject;
        SceneObjects roomData;
        void Start()
        {
            appId = int.Parse("1");
            roomId = "test";
            serverHost = "192.168.2.50";
            serverPort = int.Parse("8823");

            StartCoroutine(WaitForInit());
        }

        private IEnumerator WaitForInit()
        {
            MEHoloEntrance entrance = MEHoloEntrance.Instance;

            while (!entrance.HasInit)
            {
                yield return null;
            }


            // Todo: Begin your logic
            inputManager = MultiInputManager.Instance;
            inputManager.cbTap += OnTap;

            cm = CollaborationManager.Instance;
            cm.AddMessageHandler(this);
            cm.appId = appId;
            cm.roomId = roomId;
            cm.serverHost = serverHost;
            cm.serverPort = serverPort;
            cm.cbEnterRoom = cbEnterRoom;

            roomData = new SceneObjects();
            string showId = "showId001";
            bool enabled = false;
            string obj_type = "ColorType";
            float[] pr = new float[7];
            float[] prInit = new float[7];
            showObject = new ShowObject(showId, enabled, pr, prInit);
            showObject.obj_type = obj_type;
            roomData.ShowObjectDic.Add(showObject.show_id, showObject);
            cm.roomInitData = roomData;
            cm.TurnOn();

        }

        private void OnTap(int count)
        {
            ClickCube();
        }
        /// <summary>
        /// Callback function of EnterRoom
        /// </summary>
        private void cbEnterRoom()
        {
            Debug.Log("Enter Room Sucessfully");
        }

        [ContextMenu("ClickCube")]
        private void ClickCube()
        {
            CurrentColor += 1;
            if ((int)CurrentColor > 2)
            {
                CurrentColor = 0;
            }
            //ChangeCubeColor(CurrentColor);
            showObject.pr[0] = (float)CurrentColor;
            roomData.ShowObjectDic[showObject.show_id] = showObject;
            MsgEntry entry = new MsgEntry(OP_TYPE.UPD, showObject.show_id, true, showObject.pr, null, null);
            entry.obj_type = showObject.obj_type;
            cm.SendMessage(new MsgEntry[1] { entry });
            //Debug.Log(showObject.pr[0]);
        }

        void ChangeCubeColor(ColorType CurrentColor)
        {
            GameObject cube = GameObject.Find("Cube");

            switch (CurrentColor)
            {
                case ColorType.red:
                    cube.GetComponent<Renderer>().material.color = Color.red;
                    break;
                case ColorType.blue:
                    cube.GetComponent<Renderer>().material.color = Color.blue;
                    break;
                case ColorType.green:
                    cube.GetComponent<Renderer>().material.color = Color.green;
                    break;
            }
        }
        void Update()
        {
            if (Input.GetMouseButtonDown(0))
            {
                Ray ray = Camera.main.ScreenPointToRay(Input.mousePosition);
                RaycastHit hit;
                if (Physics.Raycast(ray, out hit))
                {
                    if (hit.collider.name == "Cube")
                    {
                        ClickCube();
                    }

                }
            }
        }
        void IMessageHandler.DealMessage(SyncProto proto)
        {

            this.DealMessage(proto);
        }
        void DealMessage(SyncProto proto)
        {
            MsgEntry[] messages = proto.sync_msg.msg_entry;
            //Debug.Log("deal message");
            if (messages == null)
                return;
            for (int i = 0; i < messages.Length; i++)
            {
                MsgEntry msgEntry = messages[i];
                if (msgEntry.show_id == showObject.show_id)
                {
                    ChangeCubeColor((ColorType)((int)msgEntry.pr[0]));
                }

            }
        }
    }

}
- Now you can build and install the app on HoloLens to see the results.
- After the app started, you will see a cube. air-tap the cube to change its color, and the color would be synchronized to other connected devices through the Workstation. For instance, you can view the synchronized change of color in Unity editor if the app is running.

Live Controller Module
Functionalities
LiveController provides the following functions:
- Communicate with the SpectatorView of the HoloLens on the Rig to synchronize spacial anchors in real-time.
- Use of keyboards to adjust the position and angle of the Anchor, if the automatical synchronization failed.
- Control the upload and download of SpectatorView WorldAnchor via the Workstation.
- Compose the images captured by the camera on the Rig with virtual scenes, and cast it out.
- Record the composed video stream as MPEG-4 file with a maximum resolution of 4K.
Please follow the instructions below to create a demo app.
Prepare Your Project
- Create a Unity project and set it up accordingly for HoloLens apps (refer to doc "Holograms 101E" by Microsoft).
- Create a Scene, and save it as "LiveSample".
- Create a Cube object, and place it in a position where the camera can capture.
- Set up METoolkit modules (refer to the ME-HoloEntrance instructions).
- Confirm to check Anchor, Input, Cursor, Collaboration, and Live Modules in HoloEntrance.
- Create a folder name "StreamingAssets" under the "Assets" directory. Copy file "CalibrationData.txt" in "DataMesh\ARModule\SpectatorView" to the "StreamingAssets" folder we just created.

Set up Anchor
In the Hierarchy view, locate the "MEHolo/AnchorManager" and check it. In the Inspector view, the below panel will show up. Set its parameters on the panel.
- App Id: the unique ID of the app in 4-bytes integer.
- Room Id: the unique ID of the room in string. A room in ME-Live! is where players get together and collaborate with each other. Scenes in a room are synchronized via the Workstation.
- Server Host: the workstation's IP address.
- Server Port: the port number of the service on the workstation, defaults to 8823.
Choose the Object "Cube", and then add "AnchorDefinition" in the Inspector Panel.
Note: the size of the bounds is only used for showing the Anchor when it is moved. It has no practical significance and can be set according to your preferences.
Set up Prameters
In the Hierarchy view, locate the "MEHolo/LiveController" and check it. In the Inspector view, the below panel will show up. Set its parameters on the panel or in your code.

- Listen Port: set to 8099.
- Output Path: the storage place for video recordings, e.g. "
C:\\HologramCapture\\LiveSample\\" (Note the double slashes and the trailing slashes)
Edit Live Scene
- Create an object named "MainApp" in Hierarchy view.
- Add a new module "LiveSample" and then save.
- Open the "LiveSample" to add the following codes:
using System.Collections;
using UnityEngine;
using DataMesh.AR;
using DataMesh.AR.Anchor;
using DataMesh.AR.Interactive;
using DataMesh.AR.SpectatorView;

namespace DataMesh.AR.Samples.SpectatorView
{

    public class LiveSample : MonoBehaviour
    {
        private SceneAnchorController anchorController;
        private MultiInputManager inputManager;
        private LiveController bevController;

        void Start()
        {
            bevController = LiveController.Instance;

            StartCoroutine(WaitForInit());
        }

        private IEnumerator WaitForInit()
        {
            MEHoloEntrance entrance = MEHoloEntrance.Instance;

            while (!entrance.HasInit)
            {
                yield return null;
            }
            anchorController = SceneAnchorController.Instance;

            anchorController.serverHost = "192.168.8.250";
            anchorController.serverPort = int.Parse("8823");
            anchorController.appId = int.Parse("1");
            anchorController.roomId = "test";

            // Todo: Begin your logic
            inputManager = MultiInputManager.Instance;
            inputManager.cbTap += OnTap;

            bevController.outputPath = "C:\\HologramCapture\\LiveSample\\";
            bevController.cbStartMoveAnchor = OnStartMoveAnchor;
            bevController.cbEndMoveAnchor = OnEndMoveAnchor;
            bevController.listenPort = int.Parse("8099");
            bevController.TurnOn();
        }
        /// <summary>
        /// Callback function before moveing anchor
        /// </summary>
        private void OnStartMoveAnchor()
        {
            //Todo Before Moveing Anchor
        }
        /// <summary>
        /// Callback function after moveing anchor
        /// </summary>
        private void OnEndMoveAnchor()
        {
            //Todo After Moveing Anchor
        }
        private void OnTap(int count)
        {
            inputManager.cbTap -= OnTap;

            SceneAnchorController.Instance.cbAnchorControlFinish = ModifyAnchorFinish;
            SceneAnchorController.Instance.TurnOn();
        }

        private void OnTapUpload(int count)
        {
            CursorController.Instance.isBusy = true;
            SceneAnchorController.Instance.UploadAnchor((bool success, string error) =>
            {
                CursorController.Instance.isBusy = false;
                if (success)
                {
                    CursorController.Instance.ShowInfo("Upload Anchor Success!");
                }
                else
                {
                    CursorController.Instance.ShowInfo("Upload Error! reason is: " + error);
                }
            });
        }

        private void OnTapDownload(int count)
        {
            CursorController.Instance.isBusy = true;
            SceneAnchorController.Instance.DownloadAnchor((bool success, string error) =>
            {
                CursorController.Instance.isBusy = false;
                if (success)
                {
                    CursorController.Instance.ShowInfo("Download Anchor Success!");
                }
                else
                {
                    CursorController.Instance.ShowInfo("Download Error! reason is: " + error);
                }
            });
        }

        private void ModifyAnchorFinish()
        {
            SceneAnchorController.Instance.TurnOff();
            inputManager.cbTap += OnTap;
        }
    }
}
- Now you can release an ".exe" application for the Workstation.
- Open "Edit > Project Settings > Quality" window in Unity.
- Choose "Simple" under "Levels", and choose "Don't Sync" under "V Sync Count" in "Other". Do this for "Good"、"Beautiful"、"Fantastic" levels.
- Open "File > Build Settings" window.
- Click "Add Open Scenes" to add Scene from LiveSample.
- Change Platform to be "PC, Mac & Linux Standalone" and click "Switch Platform".
- Choose "Windows" for "Target Platform" and "x86_64" for "Architecture".
- Click "Player Settings" and click "PC, Mac & Linux Standalone" on Inspector panel.
- Expand "Other Settings".
- Choose ".NET 2.0" for "API Compatibility level" under "Optimization".
- Go back to "Build Settings" window and click "build". Create a new folder and name it with app name, and save.
Try Live
- Start SpectatorView App on the Hololens of the Rig.
- Start ".exe" program on the Workstation.
- There will be an operation panel on the screen:

- Click the "Connect HoloLens Spectator View" button on the right-side panel. Then the program would try to connect to the HoloLens on the Rig.

- If the connection succeeded, an echo text "HoloLens connected" would show up. Otherwise, "HoloLens offline" would appear. When connection failed, retry from the first step.

- With a successful connection, the program will try to synchronize automatically, and the "Start Follow" button would turn blue. You will see from the monitor screen that the real-time Holo Graphics are captured.
- If you want to synchronize with another HoloLens, you need to:
- First click "Stop Follow" to stop synchronization.
- Then Click "Download Anchor".
- Upon success, the position of the HoloGraphics would change and the synchronization would start automatically.
- If an alert of anchor not positioned appears, it means the spacial information scanned by the two HoloLens is different. You need to move the HoloLens to do a rescan until the alert disappears.
- There is a MR preview window in the upper right corner. You can click the "Full Screen" button to make it display in Full-Screen Mode, and to exit press the "Esc" key on the keyboard. You can also click "hide/show Preview" to hide or show the Preview window.
- To record a MR video, click "Begin Capture". And a red "REC" sign would appear on the window as an indication. To finish recording, click "Stop Capture", and you can see the video file at the path you configured previously.
- To capture a screenshot, click "Take Snap" to save the captured picture to the same path for video recordings.
Note: The "Download Spatial" button is currently unused.
Configuration Files
Functionalities
The use of configuration file adds dynamical aspects to the apps. We recommend you to use a configuration file to control the volatile properties in your apps.
Note: You need to place your config file in "StreamingAssets" folder so that when the app starts at its first time the config file would be automatically copied to "PersistentDataPath" directory and later on the app would load the configs from the "PersistentDataPath".
Use Configuration File
Below is an example config file.
###############################################
# config for app
###############################################

#### Colaberation Server Config ####
Server_Url = 192.168.1.48
Server_Port = 8823

#### Storage Config
License = 3ACE54EFC4B267908AB5210EDFB16A3F

#### HologramCapture Config
 Out_Put_Path = C:\\HologramCapture\\HoloReady\\
Name it config.ini and put it in "StreamingAssets" folder.
Use AppConfig
- Check whether there is a "config.ini" file in local "StreamingAssets" directory. If not, create it from the example above.

- To get the configured data, call the GetConfig(string) method of AppConfig in your scripts.
    void Start () {
        string AppID =  AppConfig.Instance.GetConfig("Server_Url");
    }
- There is an overloaded method GetConfig(string, string). The first parameter is the key of configurations, and the second parameter is the default value to return if the method is unable to locate the config value by the given key.
    void Start () {
        string AppID =  AppConfig.Instance.GetConfig("Server_Url","127.0.0.1");
    }
MEHoloSDK Docs
Overview
The aim of MEHolo SDK is to provide methods and APIs that developers can use to build their own application. In addition, based on Xamarin's cross-platform solution, MEHolo SDK can be integrated with the different platforms such as iOS, Android, UWP and .Net Framework.
Basic Usage
- Open Unity and import
MEHolo SDK Unity packagedirectly fromAssets->Import Package->Custom Package. - For MEHoloSDK-Plugins-Unity, change all DLL files to be in support of Editor and Standalone platform only.

- For MEHoloSDK-Plugins-UWP, change all DLL files to be in support of WSAPlayer only.

Function and API
Picture Uploading
This method is used to upload images to HoloCloud-Share.
By using the given file path
//UWP
public async Task<HoloServerResp<string>> UploadImage(string fileName, string filePath, int appId, string token, string tags)
{
}

//Unity
public HoloServerResp<string> UploadImage(string fileName, string filePath, int appId, string token, string tags)
{
}
Parameters
| Name | Type | Description |
|---|---|---|
| filename | string | the name of the picture |
| filePath | string | the file path |
| appId | int | the project id |
| token | string | the access token |
| tags | string | tags |
Demo code
//UWP
var resultUWP = await api.UploadImage("name", path, 1111, "3ACE54EFC4B267908AB5210EDFB16A3F", "");
//Unity
var resultUnity = api.UploadImage("name", path, 1111, "3ACE54EFC4B267908AB5210EDFB16A3F", "");
Upload directly
//UWP
public async Task<HoloServerResp<string>> UploadImage(string fileName, byte[] fileBytes, int appId, string token, string tags)
{
}

//Unity
public HoloServerResp<string> UploadImage(string fileName, byte[] fileBytes, int appId, string token, string tags)
{
}
Parameters
| Name | Type | Description |
|---|---|---|
| filename | string | the name of the picture |
| fileBytes | byte array | the content of the image |
| appId | int | the project id |
| token | string | the access token |
| tags | string | tags |
Demo code
var bytes = File.ReadAllBytes(filePath);
//UWP
var resultUWP = await api.UploadImage("name", bytes, 1111, "3ACE54EFC4B267908AB5210EDFB16A3F", "");
//Unity
var resultUnity = api.UploadImage("name", bytes, 1111, "3ACE54EFC4B267908AB5210EDFB16A3F", "");
Image Download
This method is used to download images from HoloCloud Share (Social).
Download to Local
//UWP
public async Task DownloadImage(string imageId, string organizationId, string imageType, string xtoken, string downloadPath)
{
}

//Unity
public void DownloadImage(string imageId, string organizationId, string imageType, string xtoken, string downloadPath)
{
}
Parameters
| Name | Type | Description |
|---|---|---|
| imageId | string | the image id |
| organizationId | string | the organization id |
| imageType | string | indicate the image type |
| xtoken | string | the access token |
| downloadPath | string | the file path include file name |
Demo code
//UWP
await api.DownloadImage("05c4d859-8a42-46ae-b2d0-28e0f45aa633EWApUUPTI", "1003", "original", "token", localPath);

//Unity
api.DownloadImage("05c4d859-8a42-46ae-b2d0-28e0f45aa633EWApUUPTI", "1003", "original", "token", localPath);
Get image contents
//UWP
public async Task<byte[]> DownloadImage(string imageId, string organizationId, string imageType, string xtoken)
{
}

//Untiy
public byte[] DownloadImage(string imageId, string organizationId, string imageType, string xtoken)
{
}
Parameters
| Name | Type | Description |
|---|---|---|
| imageId | string | the image id |
| organizationId | string | the organization id |
| imageType | string | indicate the image type |
| xtoken | string | the access token |
Demo code
//UWP
var fileBytesUWP = await api.DownloadImage("05c4d859-8a42-46ae-b2d0-28e0f45aa633EWApUUPTI", "1003", "original", "token");

//Unity
var fileBytesUntity = api.DownloadImage("05c4d859-8a42-46ae-b2d0-28e0f45aa633EWApUUPTI", "1003", "original", "token");
File Upload
You can use this method to upload the local file to MEHolo Server.
//UWP
public async Task<HoloServerResp<string>> UploadFile(string fileName, string filePath, int blockIndex, int appId, string token)
{
}

//Unity
public HoloServerResp<string> UploadFile(string fileName, string filePath, int blockIndex, int appId, string token)
{
}
Parameters
| Name | Type | Description |
|---|---|---|
| fileName | string | the name of the file |
| filePath | string | the file path |
| blockIndex | int | indicate the index of the file blocks |
| appId | int | the app id |
| token | string | the access token |
Demo code
//UWP
var responseUWP = await api.UploadFile("a.mp4", filePath, 0, 1, "token");

//Unity
var responseUnity = api.UploadFile("a.mp4", filePath, 0, 1, "token");

//Check progress
var progress = api.CheckProgress("a.mp4");
File Download
This method is used to download files from MEHolo Server
//UWP
public async Task DownloadFile(string fileId, string token, string downloadPath, int timeout)
{
}

//Unity
public void DownloadFile(string fileId, string token, string downloadPath, int timeout)
{
}
Parameters
| Name | Type | Description |
|---|---|---|
| fileId | string | the file id |
| token | string | the access token |
| downloadPath | string | the file path |
| timeout | int | indicate the timeout value |
Demo code
//UWP
await api.DownloadFile(fileId, token, downloadPath, 40);

//Unity
api.DownloadFile(fileId, token, downloadPath, 40);
Get Lecture List
This method is used for getting lecture list.
//UWP
public async Task<List<Lecture>> GetLectures(string token)
{
}

//Unity
public List<Lecture> GetLectures(string token)
{
}
Parameters
| Name | Type | Description |
|---|---|---|
| token | string | the access token |
Demo code
//UWP
var lectures = await api.GetLectures(token);

//Unity
var lectures = api.GetLectures(token);
Note: Detailed lecture information is required for some method, which can be retrieved from the lecture list. Giving the following code as an example.
//get a certain lecture
var lecture = lectures[0];
//get a lecutre's content
var lectureContent = lecture.LectureContent[0];
//get the name of the video
var videoName = lectureContent.VideoName;
//get screenshot prefix
var screenshotPrefix = lectureContent.ScreenshotPrefix;
//get the name of the model
var modelName = lectureContent.ModelName;
//get hls url
var hlsUrl = lecture.HlsBaseUrl + "/" + lectureContent.HlsSubLocation + "/" + lectureContent.HlsName;
Video Download
This method is used to download a specific video.
//UWP
public async Task<byte[]> DownloadVideoLecture(string videoName, string token)
{
}

//Unity
public byte[] DownloadVideoLecture(string videoName, string token)
{
}
Parameters
| Name | Type | Description |
|---|---|---|
| videoName | string | the name of the video |
| token | string | the access token |
Demo code
//UWP
var videoBytes = await api.DownloadVideoLecture(videoName, token);

//Unity
var videoBytes = api.DownloadVideoLecture(videoName, token);
Get Thumbnail of Video
This method is used to get the thumbnail of a certain video.
//UWP
public async Task<byte[]> DownloadThumbnail(string screenshotPrefix, string token)
{
}

//Unity
public byte[] DownloadThumbnail(string screenshotPrefix, string token)
{
}
Parameters
| Name | Type | Description |
|---|---|---|
| screenshotPrefix | string | you can get it from the lecture list |
| token | string | the access token |
Demo code
//UWP
var thumbnail = await api.DownloadThumbnail(screenshotPrefix, token);

//Unity
var thumbnail = api.DownloadThumbnail(screenshotPrefix, token);
Model Download
This method is used to download a specific model.
//UWP
public async Task<byte[]> DownloadModel(string modelName, string token, int timeout)
{
}

//Unity
public byte[] DownloadModel(string modelName, string token, int timeout)
{
}
Parameters
| Name | Type | Description |
|---|---|---|
| modelName | string | you can get it from lecture list |
| token | string | the access token |
Demo code
//UWP
var model = await api.DownloadModel(modelName, token, 40);

//Unity
var model = api.DownloadModel(modelName, token, 40);
Check If the Anchor Exists
This method is used to check if the given anchor file exists in the room managed by the MEHolo Server.
//UWP
public async Task<bool> Exists(int app, string room)
{
}

//Unity
public bool Exists(int app, string room)
{
}
Parameters
| Name | Type | Description |
|---|---|---|
| app | int | the project id |
| room | string | the name of the room |
Demo code
//UWP
var result = await api.Exists(1, room);

//Unity
var result = api.Exists(1, room);
Anchor Upload
This method is used to upload an anchor file to MEHolo Server.
//UWP
public async Task<bool> UploadAnchor(int app, string room, string fileName, byte[] fileBytes)
{
}

//Unity
public bool UploadAnchor(int app, string room, string fileName, byte[] fileBytes)
{
}
Parameters
| Name | Type | Description |
|---|---|---|
| app | int | the project id |
| room | string | the name of the room |
| fileName | string | the anchor file name |
| fileBytes | byte[] | the content of the anchor file |
Demo code
byte[] bytes = DoGetBytesFromFile();

//UWP
var result = await api.UploadAnchor(1, room, "a.json", bytes);

//Unity
var result = api.UploadAnchor(1, room, "a.json", bytes);
Anchor Download
This method is used to download anchor file.
//UWP
public async Task<byte[]> DownloadAnchor(int app, string room)
{
}

//Unity
public byte[] DownloadAnchor(int app, string room)
{
}
Parameters
| Name | Type | Description |
|---|---|---|
| app | int | the project id |
| room | string | the room name |
Demo code
//UWP
var anchor = await api.DownloadAnchor(1, room);

//Unity
var anchor = api.DownloadAnchor(1, room);
Enter the room
If the local room is empty, it will initialize the room according to the given scene. You will get a server time if you entered a room.
//UWP
public async Task<bool> EnterAppRoom(int app, string room, SceneObjects initialScene)
{
}

//Unity
public bool EnterAppRoom(int app, string room, SceneObjects initialScene)
{
}
Parameters
| Name | Type | Description |
|---|---|---|
| app | int | the project id |
| room | string | the room name |
| initialScene | SceneObjects | the initial scene object |
Demo code
var scene = new SceneObjects();
scene.ShowObjectDic.Add("showid111", new ShowObject("showid111", true, new[] { 1.5f }, new[]{ 1.2f }) { obj_type = "type1" });

//UWP
var initTime = await api.EnterAppRoom(1, room, scene);
//Unity
var initTime = api.EnterAppRoom(1, room, scene);
Check If the Room Is Empty
This method is used to check if a certain room is empty.
//UWP
public async Task<bool> QueryAppRoom(int app, string room)
{
}

//Unity
public bool QueryAppRoom(int app, string room)
{
}
Parameters
| Name | Type | Description |
|---|---|---|
| app | int | the project id |
| room | string | the room name |
Demo code
//UWP
var isEmpty = await api.QueryAppRoom(1, room);

//Unity
var isEmpty = api.QueryAppRoom(1, room);
Initialize room
This method is used to initialize the scene of a certain room,
//UWP
public async Task InitRoom(SceneObjects scene, int app, string room)
{
}

//Unity
public void InitRoom(SceneObjects scene, int app, string room)
{
}
Parameters
| Name | Type | Description |
|---|---|---|
| scene | SceneObjects | the local scene |
| app | int | the project id |
| room | string | the room name |
Demo code
//UWP
await InitRoom(scene, 1, room);

//Unity
InitRoom(scene, 1, room);
Sync Time
This method can be used to get the delay between local machine and the remote MEHolo Server.
public void StartSyncTime()
{
}
Demo code
SyncTimeClient syncTimeClient = new SyncTimeClient("ws://192.168.1.142:8823/sync/time");
//UWP
try
{
    syncTimeClient.StartSyncTime();

    Task.Delay(3000).Wait();
    int i = 0;
    while (i < 8000)
    {
        Task.Delay(100).Wait();
        if (!syncTimeClient.SyncTimeRunning)
            continue;
        i++;
        Debug.WriteLine("deley = " + syncTimeClient.Delay);
    }
}
finally
{
    syncTimeClient.Terminate();
    Task.Delay(3000).Wait();
}

//Unity
try
{
    syncTimeClient.StartSyncTime();

    Thread.Sleep(3000);
    int i = 0;
    while (i < 8000)
    {
        Thread.Sleep(100);
        if (!syncTimeClient.SyncTimeRunning)
            continue;
        i++;
        Debug.WriteLine("deley = " + syncTimeClient.Delay);
    }
}
finally
{
    syncTimeClient.Terminate();
    Thread.Sleep(3000);
}